Integrate SDKs
Once you have properly configured FCM and APNS you will need to integrate the SDKs into your project.
∞ Prerequisites
∞ Android Additional
- Firebase Account and a
google-services.json(follow this guide). Do not initialize anything, this plugin just requires agoogle-services.jsonin your android/app folder. - Enable Multidex (If your minSdkVersion is lower than 21)
- For Android 12 support,
compileSdkVersionmust be set to 31. (if you use Kotlin, use version1.5.30)
∞ iOS Additional
- Xcode - The easiest way to get Xcode is from the App Store , but you can also download it from developer.apple.com if you have an AppleID registered with an Apple Developer account.
- Enable capabilities within your iOS app.
- Configure APNs in order to work with iOS platform.
∞ Create a Flutter application
Create a new Flutter project.
flutter create example∞ Add Pusher Beams SDK
Inside the project directory, run the following command to add our library.
flutter pub add pusher_beams∞ Android
∞ Add Firebase config file to your project
Have you downloaded the google-services.json config file from your Firebase project console?
If not, see this video.
∞ Move config file into project
Move your google-services.json config file into your project, in the example/android/app directory:
example/android/app/google-services.json∞ Update your project-level gradle config
Edit project level Gradle build script (example/android/build.gradle) and add the following line to dependencies.
classpath 'com.google.gms:google-services:4.2.0'∞ Update your app-level gradle config
And edit the app level Gradle build script (example/android/app/build.gradle) and add the following line.
apply plugin: 'com.google.gms.google-services'∞ iOS
Open the iOS project (example/ios) in XCode and go to Build Settings and ensure that “iOS Deployment Target” is not lower than iOS 10.0. Then go to “Signing and Capabilities” and set the “Bundle Identifier” to the App ID you created in your Apple Account.
∞ Enable Capabilities
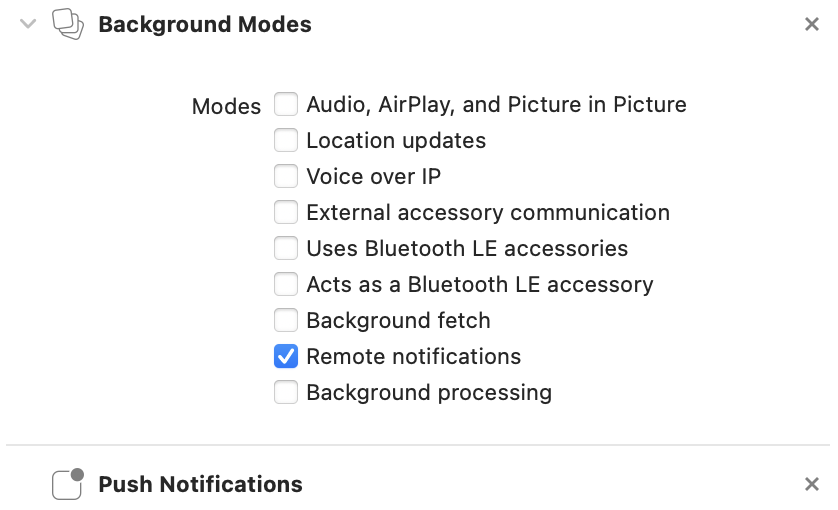
In the project navigator, select your project, and click on the Signing & Capabilities tab. Enable Push Notifications by clicking on the “+ Capability” button.
Enable Remote notifications in the Background Modes section.

∞ Import Pusher Beams and add a device interest
Now it’s time to use Pusher Beams in your code. The following snippet includes the imports and the lines you need to add to your main() function in lib/main.dart file.
import 'package:pusher_beams/pusher_beams.dart';

void main() async {
  WidgetsFlutterBinding.ensureInitialized();

  const instanceID = '00000000-0000-0000-0000-000000000000';
  await PusherBeams.instance.start(instanceID);
  await PusherBeams.instance.setDeviceInterests([‘hello’]);

  runApp(const MyApp());
}
Remember that the main function must be async.
Your instance ID can be found in the dashboard. Replace the instanceID with the id of the Beams instance you just created.
We subscribe the app to the interest hello on line 8.
When your server publishes a push notification to the interest hello, it will get passed to your app.
The SDK also provides more ways to add and remove interests.
await PusherBeams.instance.addDeviceInterest('bananas');
await PusherBeams.instance.removeDeviceInterest('bananas');
await PusherBeams.instance.clearDeviceInterests();
∞ Where Next?
Now that you have initialized Pusher Beams, why not send a notification?